
 by
by 
Ubuntu users can now install the latest Linux 6.5 kernel series. Here’s a quick and easy-to-follow tutorial with screenshots on installing Linux 6.5 using the Mainline Kernels Installer tool or via CLI.
Released by Linus Torvalds last Sunday, Linux kernel 6.5 brings new features like Wi-Fi 7 support, MIDI 2.0 support, ACPI support for the RISC-V architecture, Landlock support for UML (User-Mode Linux), better support for AMD “Zen” systems, and much more.
Linux kernel 6.5 is now available for installation on Ubuntu systems from their official Ubuntu Mainline Kernel Archive and it’s supported on amd64 (x86_64), AArch64 (ARM64), ARMhf, PowerPC 64-bit Little Endian (ppc64el), and IBM System z (s390x) architectures.
However, I should warn you that you should install Linux kernel 6.5 only if you need its features or support for specific hardware that wasn’t correctly working with previous Linux kernel versions, or if you know what you’re doing and you’re capable of fixing your installation in case your system won’t boot.
You should also know that these kernels are produced with no warranty by the Ubuntu Kernel Team, who will NOT offer support for these kernels in case you have issues, and they aren’t responsible for any damages they may cause as a result of improper installation or use.
Also, you need to know that these kernels are not signed, which means that you’ll have to disable Secure Boot before following this tutorial.
Method 1: Install Linux kernel 6.5 on Ubuntu with Mainline Kernels Installer
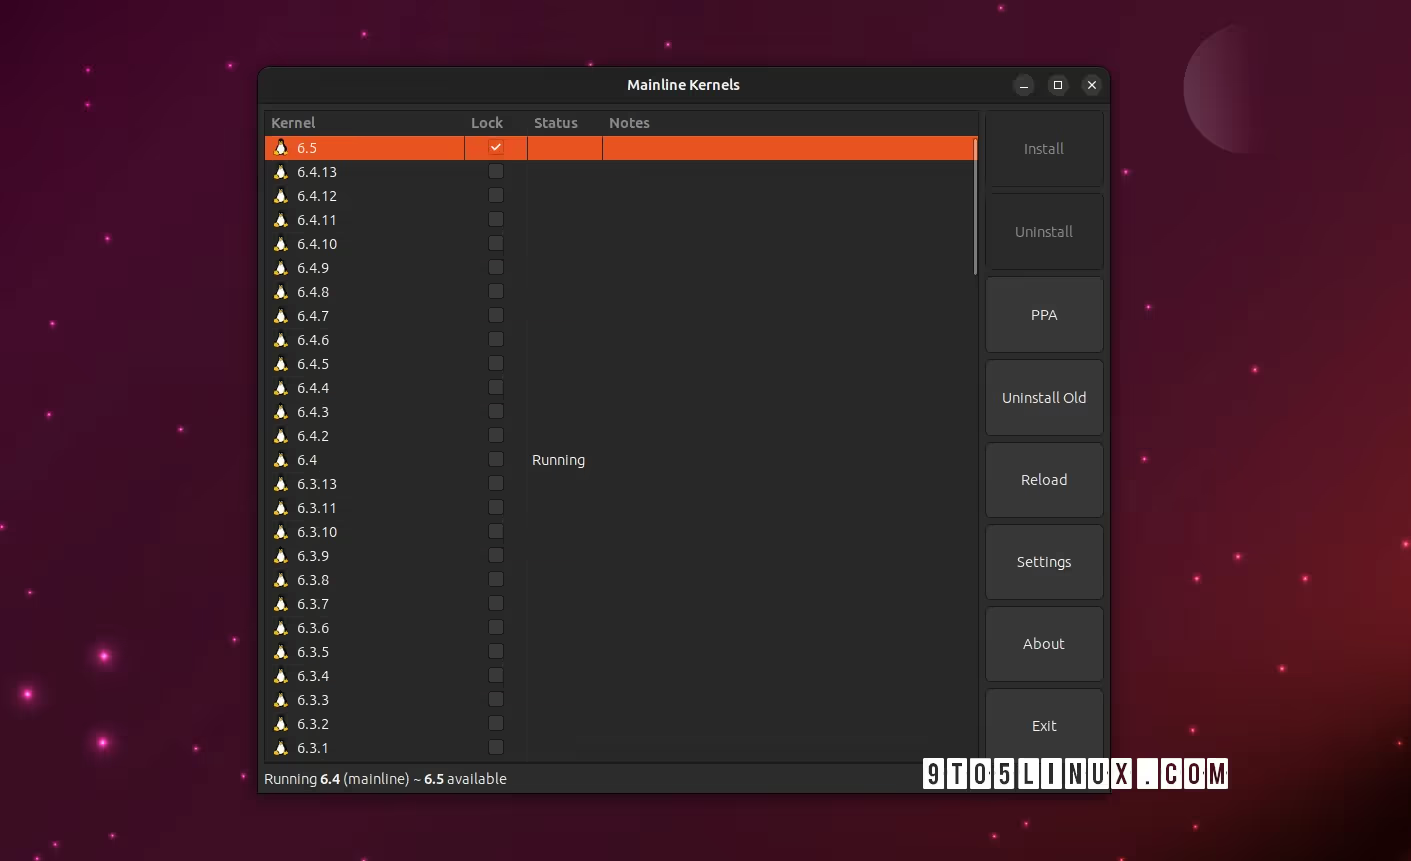
The easiest way to install the latest mainline Linux kernel on your Ubuntu computer is to use a graphical tool called Mainline Kernels Installer, which you can install from this PPA by running the commands below in the Terminal app.
sudo add-apt-repository ppa:cappelikan/ppa
sudo apt update && sudo apt full-upgrade
sudo apt install -y mainline
Once it’s been installed, the Mainline Kernel Installer tool can be found in the applications menu. Open it and you’ll see Linux kernel 6.5 at the top. Click on the entry and then click on the big “Install” button on the right.
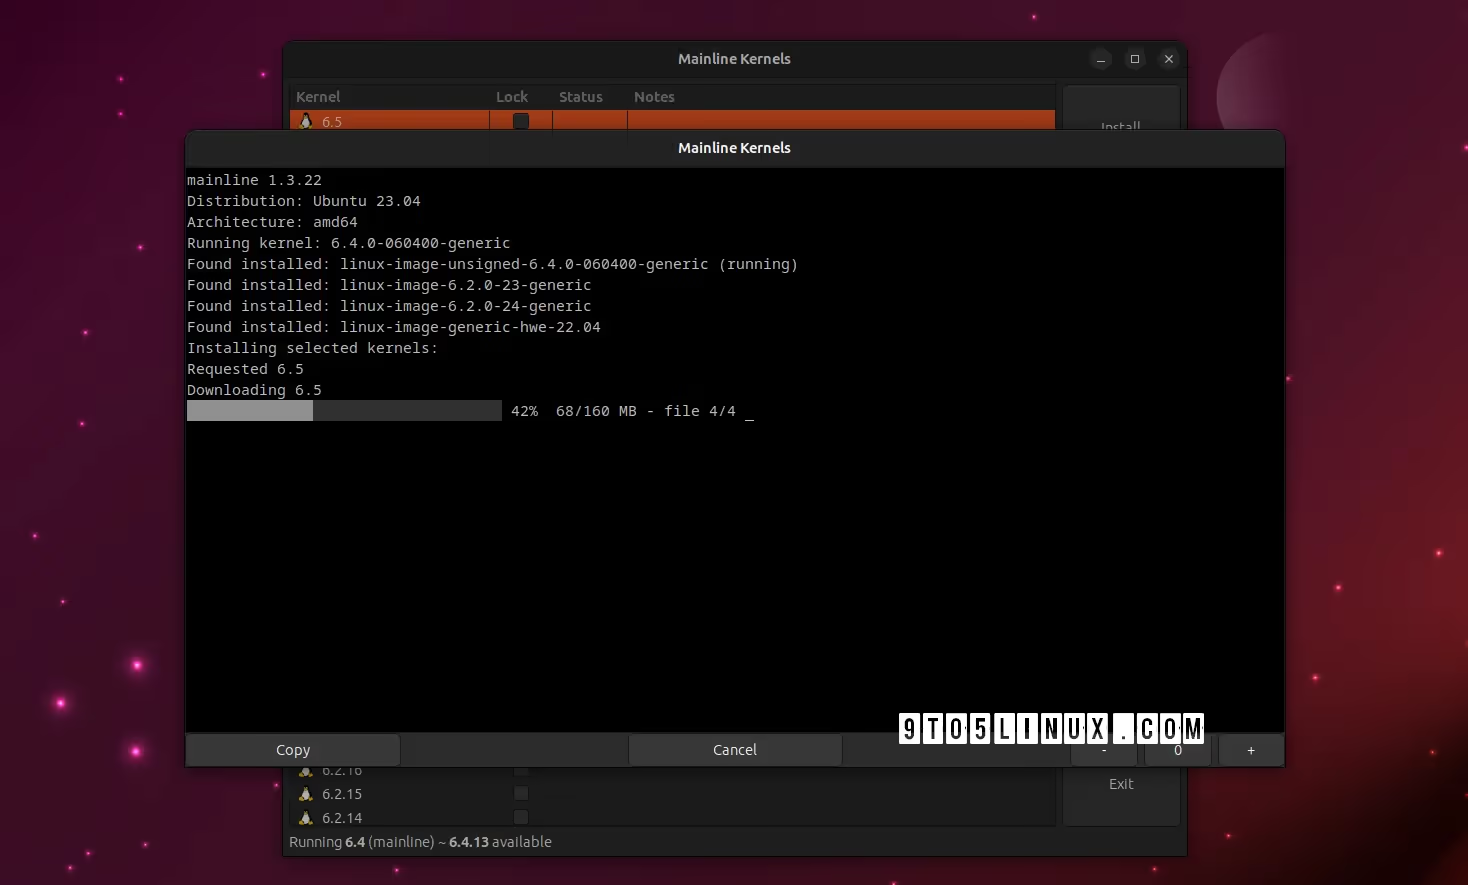
There’s currently a problem with the linux-headers package, so after installing Linux 6.5 with the Mainline Kernels Installer, you must run the command below to complete the installation.
sudo apt --fix-broken installThe advantage of using this method is that you’ll receive new kernel versions (e.g. Linux 6.5.1) when they are released upstream. The tool will inform you of new kernel versions that you’ll be able to install with a few mouse clicks.
Method 2: Install Linux kernel 6.5 on Ubuntu via CLI
This method is ONLY recommended for experienced users who know what they’re doing and don’t want to use the Mainline Kernels helper utility from the first method.
This method implies that you will have to manually download and install the kernel packages for your specific architecture from the official Ubuntu mainline kernel PPA archive for Linux 6.5 and then manually install them on your system via the command line.
Once you’ve downloaded the kernel packages in a folder that you’ll create of your choice, you can install all the .deb files from that folder by running the sudo dpkg -i *.deb command in the Terminal app or from a virtual terminal. When the installation is complete, reboot your system.
Going back to Ubuntu’s kernel or another kernel
That’s it! If you experience any issues with Linux kernel 6.5 and you want to go back to Ubuntu’s default kernel or another kernel that’s installed on your system, press the Esc key when your computer boots to view the boot menu, then access the “Advanced options” boot entry, and select a different kernel version from the list of available kernels.
Last updated 8 months ago